How to Polish Concrete
Service: Featured, Polished Concrete
Polishing concrete is an intricate process that transforms ordinary concrete floors into stunning, reflective surfaces. This guide will walk you through each step, ensuring your polished concrete floor is not only aesthetically pleasing but also incredibly durable.
Schedule ConsultationStep 1: Preparation – Setting the Stage
Assessing the Surface:
Understanding how to polish concrete effectively begins with a thorough and meticulous examination of the surface. This initial assessment is not merely a cursory glance but a detailed scrutiny of every square inch of the concrete. It’s about identifying and cataloging every imperfection, as each can significantly impact the quality and longevity of the polish.
- Identifying Visible Flaws: Begin by looking for visible cracks, chips, or areas of unevenness. These are the most apparent issues and can often be the most detrimental if not addressed. Cracks can be a sign of underlying structural issues, while chips and uneven areas can lead to an inconsistent polish.
- Feeling the Surface: After visual inspection, physically touch the surface. Run your hands over the concrete to feel for subtler issues like small pockmarks, indentations, or rough patches. These might not be immediately visible but can affect how the concrete holds the polish.
- Testing for Moisture: Moisture can be a significant problem when polishing concrete. Use a moisture meter to test the concrete’s moisture levels. High moisture content can prevent the polish from maintaining its gloss over time.
- Checking for Sealants or Coatings: Previous treatments like sealants or coatings can interfere with the polishing process. Look for areas where the light reflects differently, indicating a possible coating. If you suspect a sealant or coating is present, a small test patch can be ground to confirm.
- Determining the Concrete Hardness: The hardness of the concrete will determine the type of grinding tools and discs needed for the job. Use a concrete hardness tester, also known as a Mohs hardness tester, to gauge the surface hardness.
- Documenting the Findings: As you assess the surface, document your findings. Take notes, photos, or even videos of the areas that need attention. This documentation will be invaluable when planning the grinding and polishing stages, ensuring that no detail is overlooked.
This foundational step in the journey of how to polish concrete is about more than just identifying flaws; it’s about understanding the unique characteristics of the surface. By thoroughly assessing the surface, you ensure that the subsequent steps are tailored to the concrete’s specific needs, laying the groundwork for a stunning and durable polished finish.

Cleaning the Slate:
The foundation of a successful polish is a clean, bare surface. Using industrial-grade cleaners, like those from Prosoco, prepares the floor by ensuring the concrete’s pores are open and ready to bond with the polishing products.
Step 2: Grinding – The Initial Phase of How to Polish Concrete
Selecting the Right Tools:
Selecting the right tools is a pivotal step in the concrete polishing process, as the quality and compatibility of the tools you choose directly impact the efficiency and outcome of the grinding phase. Here’s a detailed breakdown of how to make informed choices regarding grinders and diamond-impregnated disks:
- Understanding the Grinder’s Capabilities:
- Power Source: Grinders are typically available in electric, propane, or air-powered models. Electric grinders are common for indoor use, while propane grinders are preferred for outdoor projects due to their portability and lack of reliance on electrical power.
- Size and Weight: The size of the grinder affects its maneuverability and the area it can cover. Larger grinders cover more surface area but are less maneuverable, making them ideal for open, large spaces. Smaller grinders are preferable for residential spaces or areas with intricate corners.
- Dust Management: Grinding concrete generates a significant amount of dust. Opt for grinders with built-in dust collection systems or those that can be attached to industrial dust collectors. This not only ensures a cleaner work environment but also reduces health risks associated with inhaling concrete dust.
- Choosing Diamond-impregnated Disks:
- Understanding Diamond Grit: The grit of the diamond disk determines the aggressiveness of the grinding. Lower grit numbers (like 30-40 grit) are more aggressive and are used for removing heavy material or coatings. As the grit number increases, the disk becomes finer, used for smoothing and polishing the surface.
- Bond Hardness: The bond of the diamond disk refers to the material that holds the diamonds in place. The hardness of the bond should be chosen based on the hardness of the concrete. Soft concrete requires a hard bond to prevent rapid wear of the disk, while hard concrete requires a soft bond to ensure the diamonds are exposed for effective grinding.
- Disk Configuration: Diamond disks come in various configurations, including segmented, continuous rim, and turbo. Segmented disks are ideal for aggressive grinding, continuous-rim disks are used for fine polishing, and turbo disks offer a balance between grinding and polishing.
- Evaluating Quality and Compatibility:
- Quality of Diamonds: The quality of the diamonds in the disk influences the cutting speed and lifespan of the disk. High-quality diamonds offer faster cutting speeds and longer durability.
- Compatibility with the Grinder: Ensure that the disk is compatible with the grinder in terms of size (diameter) and attachment mechanism. An incompatible disk can lead to ineffective grinding or even damage the tool or surface.
Selecting the right grinder and diamond-impregnated disks is not just about purchasing the most expensive tools available. It’s about understanding the specific needs of the project, the nature of the concrete surface, and how different tools interact with the concrete. By investing time and thought into selecting the right tools, you set the stage for an efficient, effective grinding phase, paving the way for a beautifully polished concrete surface.

The Grinding Process:
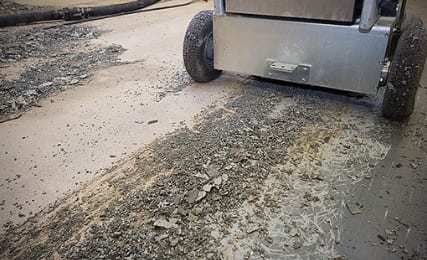
The grinding process is the cornerstone of the concrete polishing journey. It’s a methodical and precise operation that lays the groundwork for the entire polishing endeavor. Here’s an in-depth look at the initial grinding phase, emphasizing the use of a coarse 30-40 grit diamond disk:
- Purpose of the Initial Grinding Phase:
- Removing the Top Layer: The primary objective of this phase is to remove the top layer of the concrete. This includes any existing coatings, sealants, stains, or minor blemishes. It’s a transformative step that exposes the raw, untouched concrete beneath, ensuring that any subsequent polishing is done on a fresh and clean surface.
- Leveling the Surface: The coarse grit also helps in leveling the surface, removing any minor undulations or inconsistencies. This is crucial for ensuring a flat, even surface that will reflect light uniformly once polished.
- Executing the Initial Grind:
- Setting Up the Grinder: Equip the grinder with a coarse 30-40 grit diamond disk. Ensure the grinder is set up correctly, checking the fit of the disk and the stability of the machine.
- Pattern and Overlap: Begin grinding in a systematic pattern. Most professionals recommend starting from one corner and working your way across the surface in rows. Each pass should overlap the previous one by about one-third of the grinder’s width. This overlap ensures that no area is missed and that the surface is ground evenly.
- Monitoring the Surface: As you grind, pay close attention to the surface. You should see the old surface being stripped away, revealing the lighter, fresher concrete beneath. Be mindful of the dust being produced, ensuring the dust collection system is functioning correctly.
- Dealing with Imperfections: If you encounter stubborn stains, thick coatings, or deep scratches, you may need to make multiple passes over these areas. However, be cautious not to over-grind, as this can create dips or valleys on the surface.
- Assessing the Outcome:
- Surface Inspection: After the initial grinding, inspect the surface. It should appear uniformly rough and feel consistent when you run your hand over it. Any glossy or smooth areas indicate that the surface hasn’t been fully stripped and may require additional grinding.
- Cleaning: Clean the ground surface thoroughly. Removing the concrete dust will give you a clearer view of the surface, allowing you to identify any areas that may need additional attention.
The initial grinding phase is both vigorous and meticulous. It’s about stripping away the old to reveal the potential of the concrete beneath. By thoroughly and evenly grinding the surface, you create a solid foundation for the finer stages of polishing, ensuring a smoother, more consistent, and more stunning final result.
Step 3: Honing – Smoothing the Surface
Stepping Up the Grit:
After the initial aggressive grinding with a coarse grit diamond disc, the concrete surface is ready for the next crucial phase: stepping up the grit to refine and smooth the surface. This stage is pivotal as it begins to bridge the gap between the coarse grinding and the final polishing, bringing out the inherent beauty of the concrete.
- Transitioning to Medium Grit:
- Grit Selection: After the coarse grinding, typically done with a 30-40 grit diamond disc, the surface is rough and uneven with visible scratches and grooves. The next step involves transitioning to a medium grit, usually between 80 to 120 grit. This grit is abrasive enough to remove the larger scratches left by the coarse grit but fine enough to start smoothing the surface.
- Installing the Medium Grit Disc: Replace the coarse grit disc with the medium grit disc on your grinder. Ensure that the disc is properly attached and secure before proceeding. The proper installation is crucial for effective grinding and the safety of the operator.
- The Refinement Process:
- Grinding Technique: Begin grinding with the medium grit disc, using the same systematic approach as with the coarse grit: work in rows, overlapping each pass by about one-third of the grinder’s width. This ensures comprehensive coverage and consistent grinding.
- Pressure and Speed: The amount of pressure you apply and the speed at which you move the grinder can significantly affect the outcome. Medium pressure and a steady, moderate pace are recommended. Too much pressure or too fast a pace can result in uneven grinding, while too little pressure or too slow a pace can be ineffective and time-consuming.
- Monitoring Progress: As you grind, you’ll notice the coarser scratches and grooves becoming less pronounced. The surface will start to feel smoother to the touch. Regularly check the consistency of the surface by feeling it with your hands or inspecting it visually.
- Assessing the Surface:
- Surface Smoothness: After using the medium grit disc, the surface should feel significantly smoother than after the coarse grind. While some fine scratches will still be present, the larger, more noticeable scratches should be eliminated.
- Uniformity: Ensure that the surface has a uniform appearance and texture. Inconsistent areas may need additional passes with the medium grit disc. Pay particular attention to edges and corners, as these areas are often more challenging to grind evenly.
Stepping up the grit to a medium level is a transformative part of the polishing process. It’s a balancing act of removing the coarse scratches while not over-grinding the surface. This phase starts to unveil the smoother, more refined surface, setting the stage for the subsequent polishing stages that will bring out the full luster and smoothness of the concrete.
Consistency is Key:
The honing phase is where the concrete begins its transformation from a roughly ground surface to a smooth, polished canvas. Achieving consistency during this phase is not just recommended; it’s imperative. A consistent pattern ensures that each portion of the concrete surface is treated uniformly, resulting in a harmoniously polished floor.
- Understanding the Importance of Consistency:
- Uniform Scratch Pattern: Honing with a consistent pattern ensures that the scratches left by the diamond discs are uniform across the entire surface. This uniform scratch pattern is essential for achieving a floor that looks cohesive and is free from patchy or uneven areas.
- Predictable Results: Consistent honing translates to predictable outcomes. When you know that each part of the floor has been treated equally, you can anticipate how the surface will respond to subsequent grits and polishing steps.
- Achieving Consistency in Honing:
- Systematic Approach: Just like in the grinding phase, honing should be approached systematically. Divide the floor into sections and work on each section methodically, ensuring that you cover the entire area without missing any spots.
- Overlapping Passes: Each pass of the grinder should slightly overlap the previous pass. Ameripolish recommends an overlap of about one-third of the grinder’s path. This overlap helps to cover the traces left by the previous pass, ensuring a smooth and uniform honing process.
- Consistent Pressure and Speed: Apply consistent pressure and maintain a consistent speed while moving the grinder. Any variation in pressure or speed can lead to uneven honing, resulting in a floor that looks and feels inconsistent.
- Monitoring and Adjusting:
- Regular Inspection: Continuously monitor the surface as you hone. Feel the surface with your hand; it should feel uniformly smooth across the entire area. Use visual cues as well—consistent honing will produce a uniform appearance without any irregular scratch patterns.
- Adjusting Technique as Needed: If you notice any inconsistencies, adjust your technique. This might involve revisiting certain areas with additional passes or adjusting the pressure or speed of your grinder.
Consistency in honing is not just about following a pattern; it’s about treating the concrete surface with equal attention and care throughout the entire process. By maintaining a consistent pattern, as emphasized by Ameripolish, you ensure that the floor is uniformly treated, setting a solid foundation for the subsequent polishing steps. This meticulous attention to consistency is what transforms a good polishing job into a great one, resulting in a floor that’s uniformly polished, visually stunning, and tactilely smooth.
Step 4: Polishing – Achieving the Shine
The Finishing Touch:
The finishing touch stage is where the magic happens in the concrete polishing process. It’s a symphony of precision, patience, and attention to detail, resulting in a floor that’s not just smooth, but also radiantly lustrous. Here’s an in-depth look at this transformative phase:
- Gradual Progression through Finer Grits:
- Sequence of Grits: After honing the floor with a medium grit, it’s time to switch to finer grits. This typically involves progressing through grits such as 200, 400, 800, 1500, and potentially up to 3000. Each step uses a finer grit than the previous one, gently smoothing the surface more and more.
- The Role of Each Grit: The initial finer grits (like 200 and 400) continue to remove any remaining scratches from the coarser grits. As you move to higher grits (like 800 and above), the focus shifts from smoothing to polishing, giving the concrete that reflective, mirror-like finish.
- Technique and Precision:
- Even Application: Just as in the earlier stages, maintaining an even and consistent pattern is crucial. Ensure that each section of the floor receives equal treatment with each grit level. This uniformity is vital for achieving a consistent sheen across the entire floor.
- Observing the Surface: With each change in grit, observe the surface closely. You should see a noticeable difference in smoothness and reflectivity with each transition. The floor will gradually start to reflect light more clearly and show fewer and fewer scratches.
- Polishing to Perfection:
- High-Grit Polishing: When you reach high grit levels (800 and above), the process transforms from grinding to polishing. The high-grit discs don’t just smooth the surface; they start to compress the concrete’s pores, creating a natural shine. This is where the floor begins to develop its glass-like finish.
- The Final Passes: The final passes with the highest grits (like 1500 or 3000) are about perfecting the polish. These passes should be done with great care, ensuring every inch of the floor is polished uniformly. This is your last opportunity to ensure the floor’s shine is flawless.
- Assessing the Outcome:
- Visual Inspection: The finished floor should have a consistent and uniform sheen. It should reflect light clearly and evenly, with no cloudy or dull spots.
- Tactile Feedback: Running your hand over the polished surface should feel smooth and even. There should be no detectable roughness or texture from any remaining scratches.
The finishing touch stage is about bringing out the concrete’s inherent beauty, transforming it into a floor that’s not just durable and functional but also strikingly elegant. It’s a testament to the meticulous process of polishing, where each step is purposeful and each pass brings the concrete closer to perfection.
The Right Sheen:
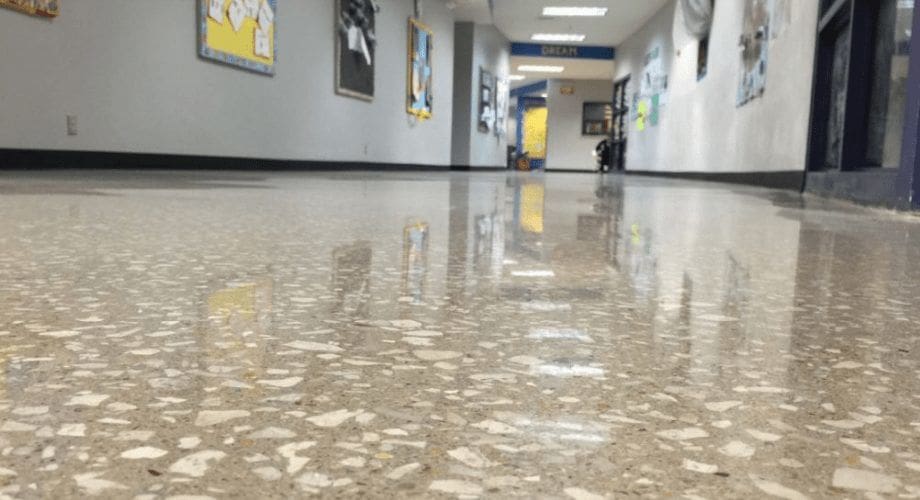
Achieving the right sheen on a polished concrete floor is a matter of personal preference and the specific demands of the space. Whether the goal is a subtle satin sheen or a glossy, wet-look finish, the key lies in the careful and strategic use of progressively finer grits during the polishing process.
- Understanding Sheen Levels:
- Satin Sheen: A satin sheen offers a soft, matte finish that reflects light gently, giving the floor a warm and inviting appearance. It’s achieved by stopping the polishing process at a mid-level grit, usually around 400 to 800. This level of sheen is often preferred in residential settings or areas where a subdued, elegant appearance is desired.
- Glossy, Wet-Look Finish: For a floor that shines like glass, a glossy, wet-look finish is the goal. This level of sheen is achieved by continuing the polishing process with very fine grits, often up to 1500, 3000, or even higher. The high-gloss finish reflects light vividly, creating a dramatic and luxurious appearance. It’s a popular choice for commercial spaces, showrooms, and areas where making a striking visual impact is the aim.
- Polishing Techniques for Desired Sheen:
- Gradual Progression: Regardless of the desired sheen, the process involves a gradual progression through the grits. Skipping grits can leave behind scratches and imperfections, detracting from the overall finish.
- Consistent Overlap: Ensure consistent overlap with each pass, regardless of the grit level. This consistency is crucial for achieving an even finish, whether you’re aiming for a satin sheen or a high-gloss surface.
- Assessing and Adjusting:
- Regular Inspection: Continuously assess the floor’s sheen as you progress through the finer grits. Use both visual inspection and tactile feedback to gauge the floor’s reflectivity and smoothness.
- Flexibility in Finishing: If the sheen isn’t meeting expectations, you have the flexibility to adjust your approach. For a higher level of shine, continue with finer grits; if the sheen is too glossy for your liking, you can revert to a slightly coarser grit to fine-tune the finish.
- Final Touches for Sheen Perfection:
- Burnishing: After reaching the desired level of sheen with diamond grits, some professionals opt to burnish the floor. Burnishing involves using a high-speed burnisher equipped with a specialized pad, enhancing the floor’s shine and further smoothing the surface.
- Sealants and Conditioners: Applying a sealant or a concrete conditioner can also affect the floor’s sheen. These products can enhance the floor’s luster, provide additional protection, and help maintain the sheen over time.
Achieving the right sheen is about understanding the interplay between the concrete, the polishing grits, and the light in the space. Whether the goal is a subtle, satin finish or a striking, high-gloss appearance, the journey involves careful choices, meticulous execution, and a keen eye for detail, culminating in a floor that’s not just a surface, but a statement.
Step 5: Sealing – Protecting Your Work
Applying the Sealant:
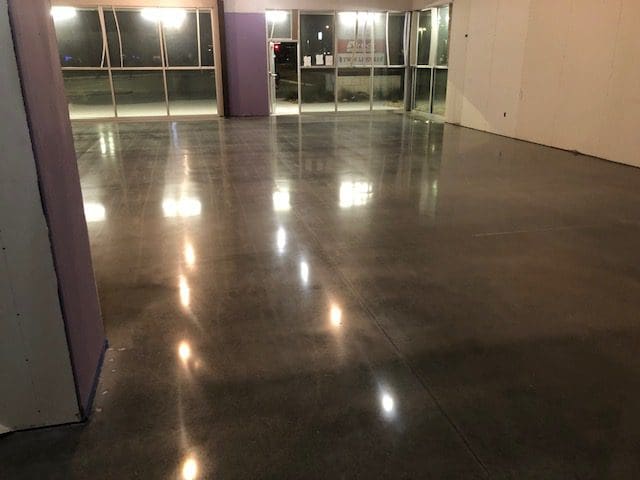
Applying the sealant to a polished concrete floor is the final, critical step in the polishing process. It’s not just a protective measure; it’s the final touch that encapsulates all the hard work and craftsmanship that went into the floor, enhancing its durability, appearance, and longevity.
- Importance of Sealant:
- Protection: The sealant acts as a barrier, protecting the polished surface from stains, spills, and wear. It penetrates the concrete’s pores, preventing substances from penetrating and causing damage.
- Aesthetic Enhancement: Beyond protection, the sealant enhances the concrete’s color and sheen. It can intensify the hue of the concrete, giving it a richer, more vibrant appearance, and can augment the sheen level achieved during the polishing process, ensuring the floor truly shines.
- Choosing the Right Sealant:
- Type of Sealant: There are various types of sealants and penetrating sealers. Each has its own set of properties in terms of durability, appearance, and maintenance requirements. The choice depends on the specific needs of the space, the level of traffic, and the desired aesthetic.
- Compatibility: Ensure that the sealant is compatible with polished concrete floors. Some sealants are specifically designed for polished surfaces and will adhere better and enhance the floor’s appearance more effectively.
- Application Process:
- Preparation: Before applying the sealant, ensure the floor is immaculately clean. Any dust, debris, or residues can affect the sealant’s adherence and appearance.
- Applying the Sealant: Follow the manufacturer’s instructions for application. Some sealants are applied with a roller, others with a sprayer, and some might require a specific applicator. Apply in thin, even coats to ensure uniform coverage. Avoid pooling or over-application, as this can lead to an uneven finish or a sealant that doesn’t properly dry or cure.
- Drying and Curing Time: Allow the sealant to dry and cure fully before allowing traffic on the floor. The drying time can vary based on the type of sealant, the temperature, and humidity. Rushing this process can compromise the protective qualities of the sealant and the overall finish of the floor.
- Assessing the Final Outcome:
- Visual Inspection: After the sealant has dried and cured, inspect the floor’s appearance. The surface should be even, with a consistent sheen. There should be no areas of cloudiness, bubbling, or peeling.
- Functional Testing: Test the floor’s resistance to water and stains. A properly sealed floor will cause liquids to bead on the surface rather than penetrating.
Applying the sealant is the culmination of the concrete polishing process. It’s about safeguarding the polished surface from the rigors of everyday use and ensuring that the floor’s beauty is preserved and highlighted. This step, when done correctly, encapsulates the hard work invested in the floor, yielding a surface that’s not only visually stunning but also resilient and long-lasting.
The Final Buff:
The final buffing is the concluding act in the symphony of the concrete polishing process. It’s not merely a touch-up; it’s a deliberate and skillful enhancement that elevates the entire appearance of the floor, ensuring it embodies the full extent of the care and craftsmanship invested throughout the process.
- Purpose of the Final Buff:
- Securing the Sealant: The final buffing helps in fully integrating the sealant with the concrete surface. It ensures that the sealant is evenly distributed and firmly adhered, offering maximum protection against wear and tear.
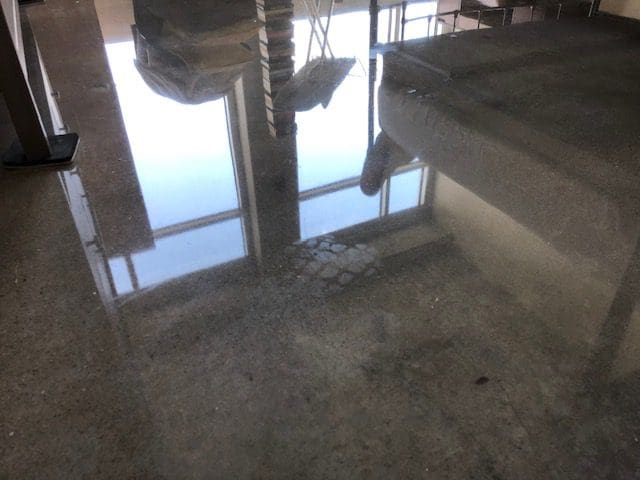
- Enhancing Gloss and Smoothness: Beyond protection, the final buffing dramatically enhances the floor’s gloss and smoothness. It’s a refinement step that brings out a rich, radiant sheen, making the floor’s surface more reflective and visually appealing.
- Selecting the Right Buffing Tools and Pads:
- Buffing Machine: A high-speed burnisher or buffer is typically used for this final stage. These machines are designed to produce high-friction heat on the surface, enhancing the sealant’s properties and bringing out the floor’s natural shine.
- Buffing Pads: The choice of buffing pad can significantly affect the outcome. Different materials and levels of abrasiveness can produce varying levels of gloss. Select a pad that is appropriate for the type of sealant used and the desired level of shine.
- Executing the Final Buff:
- Proper Technique: The technique used during the final buff is critical. Move the burnisher or buffer in a smooth, consistent pattern across the floor. Ensure even coverage to avoid uneven gloss or swirl marks.
- Speed and Pressure: The speed of the machine and the pressure applied are pivotal. A high-speed setting coupled with moderate pressure often yields the best results, enhancing the gloss without damaging the sealant or the concrete.
- Assessing the Outcome:
- Visual Inspection: Post-buffing, the floor should exhibit a uniform, high-gloss finish. The light should reflect off the surface evenly, without any dull spots or inconsistencies.
- Tactile Feedback: The floor should feel impeccably smooth to the touch. Running your hand over the surface should reveal a consistent, glass-like finish.
The final buff is a testament to the attention to detail and dedication to quality that characterizes the entire concrete polishing process. It’s the last step, but far from the least, encapsulating all the preceding work and ensuring that the polished concrete floor is not just a functional surface, but a centerpiece that reflects the utmost in craftsmanship and care.
How to Polish Concrete Maintenance – Ensuring Longevity
Maintaining polished concrete floors is about upholding its beauty and durability while respecting the work that went into its creation. It involves regular, attentive care, designed to protect the floor from daily wear and tear and to keep it looking as pristine as the day it was polished.
- Routine Cleaning:
- Daily Dust Mopping: Use a microfiber dust mop daily to remove dirt, grit, and debris. These particles can act as abrasives, potentially dulling the floor’s shine over time. A microfiber pad effectively traps and removes these particles, protecting the floor’s surface.
- Weekly Damp Mopping: In addition to daily dust mopping, perform a weekly damp mop using a neutral cleaner. The cleaner should be pH-neutral to avoid damaging the concrete’s protective sealant. Harsh chemicals or acidic cleaners can deteriorate the sealant, exposing the concrete to stains and wear.
- Immediate Spill Cleanup: Address spills promptly to prevent them from penetrating and staining the concrete. Even with a sealant, prolonged exposure to substances can lead to discoloration or damage.
- Periodic Deep Cleaning:
- Use of Automatic Floor Scrubbers: For larger or high-traffic areas, consider the use of an automatic floor scrubber equipped with non-abrasive pads. This machine can effectively clean and maintain the floor without damaging the surface.
- Spot Cleaning: For stubborn stains or marks, spot cleaning may be necessary. Use a neutral cleaner and a non-abrasive pad to gently work on the affected area. Avoid vigorous scrubbing, which can damage the floor’s finish.
- Sealant Reapplication:
- Regular Assessment: Over time, the sealant on a polished concrete floor can wear down, especially in high-traffic areas. Regularly assess the condition of the sealant, looking for signs of wear or dulling.
- Professional Reapplication: If the sealant is showing signs of wear, consider having a professional reapply the sealant. This will rejuvenate the floor’s protective layer, restore its shine, and ensure continued protection against stains and wear.
- Preventative Measures:
- Use of Floor Mats: Place floor mats at entrances to catch dirt, grit, and moisture from shoes. This simple measure significantly reduces the amount of abrasive material that comes into contact with the floor.
- Furniture Protection: Use protective pads under furniture legs to prevent scratches. Regularly check and clean these pads to ensure they remain free of grit that could damage the floor.
By adhering to these maintenance steps, you can ensure that your polished concrete floor retains its stunning appearance and structural integrity for years to come. It’s a testament to the timeless beauty and enduring strength of polished concrete, a surface that, with proper care, continues to reflect the meticulous craftsmanship and care invested in its creation.
Free Consultation
Ready to learn more about how AllStar can help you? Take advantage of our free consultation to get the ball rolling.
Get Started
