A Comprehensive Guide on How to Seal Concrete: Easy Steps for Long-Lasting Protection
Service: Concrete Resurfacing, Concrete Sealing
Welcome to our comprehensive guide on how to seal concrete! If you’re looking to protect your concrete surfaces and extend their lifespan, sealing is an essential step. Whether you have a concrete driveway, patio, or basement floor, proper sealing can prevent damage from water, stains, and other external elements. In this blog post, we’ll walk you through the process of sealing concrete, providing you with expert tips and step-by-step instructions. So, let’s get started!
Table of Contents:
- Understanding the Importance of Sealing Concrete
- Preparing Your Concrete Surface for Sealing
- Choosing the Right Sealant for Your Concrete
- Tools and Materials You’ll Need
- Step-by-Step Guide to Sealing Concrete
- Maintaining and Re-Sealing Concrete
- Frequently Asked Questions (FAQs)
- Conclusion
1. Understanding the Importance of Sealing Concrete
Before we dive into the process of sealing concrete, it’s crucial to understand why it’s necessary. Sealing your concrete surfaces offers numerous benefits, including:
- Protection against moisture: Concrete is porous, meaning it can absorb water and moisture. Sealing creates a barrier, preventing water damage, mold growth, and cracks caused by freezing and thawing.
- Stain resistance: Sealed concrete surfaces are less prone to stains from oil spills, grease, chemicals, and other substances.
- Enhancing appearance: A high-quality sealant can bring out the natural beauty of concrete, enhancing its color and texture.
- Durability and longevity: Sealed concrete is more resistant to wear and tear, increasing its lifespan and reducing maintenance costs.
2. Preparing Your Concrete Surface for Sealing
Proper preparation is key to ensuring a successful seal. Here are the steps to prepare your concrete surface:
Cleaning the Surface
Start by thoroughly cleaning the concrete to remove any dirt, debris, or stains. Use a broom to sweep the area and a pressure washer or hose to wash away stubborn dirt. For tough stains, you can use a mild detergent or specialized concrete cleaner. Rinse the surface and allow it to dry completely before moving to the next step.
Repairing Cracks and Damage
Inspect the concrete for any cracks or damage. Fill in small cracks with a concrete patching compound, following the manufacturer’s instructions. For larger cracks or significant damage, it’s best to consult a professional. Allow the repairs to cure completely before proceeding.
Etching or Grinding (If Necessary)
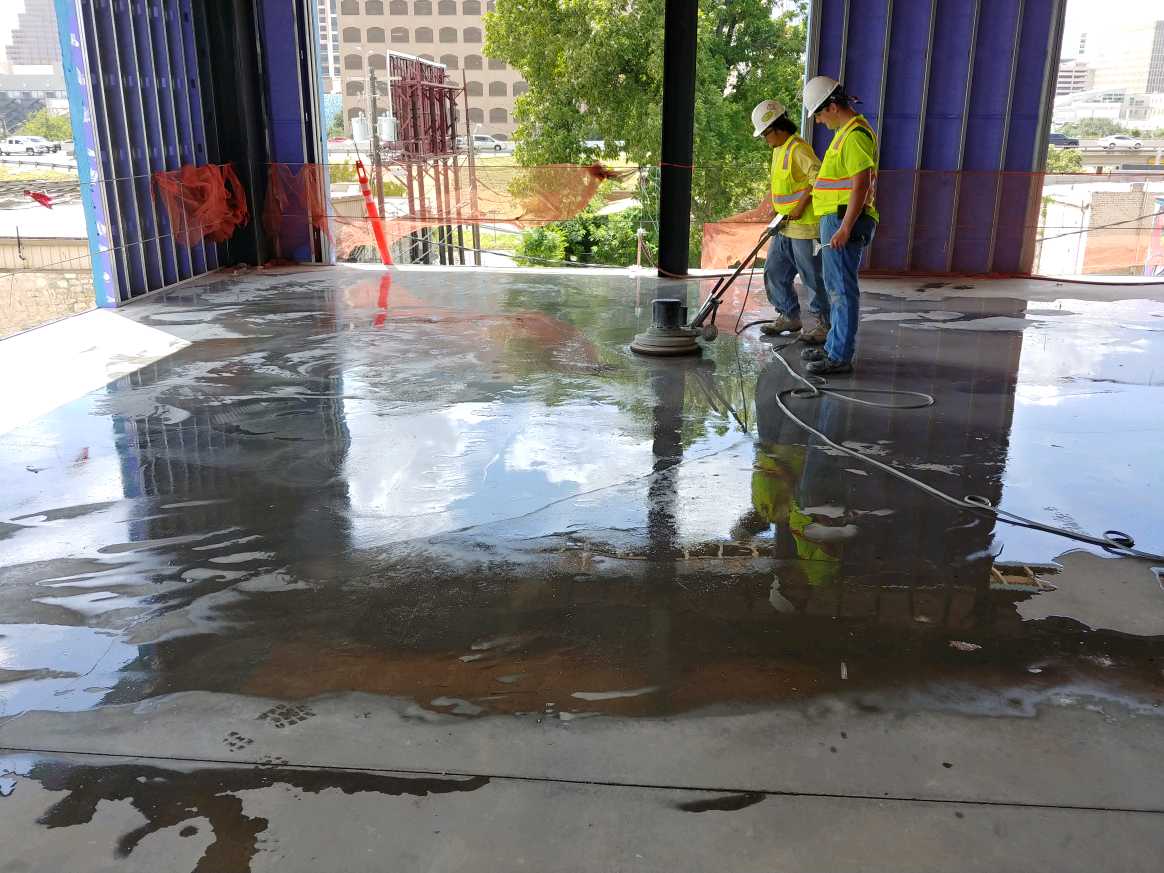
If your concrete has a smooth finish or a previous sealer, you may need to etch or grind the surface to ensure proper adhesion of the new sealant. Etching can be done using an acid-based etching solution or a mechanical grinder. Be sure to follow the safety guidelines and manufacturer’s instructions when performing this step.
3. Choosing the Right Sealant for Your Concrete
Selecting the appropriate sealant is crucial for achieving the desired results. There are two main types of concrete sealers: topical sealers and penetrating sealers.
Topical Sealers
Topical sealers create a protective layer on the surface of the concrete. They are available in various finishes, such as glossy, matte, or satin. Topical sealers are ideal for decorative concrete surfaces, as they enhance the color and provide excellent stain resistance. However, they may require more frequent reapplication compared to penetrating sealers.
Penetrating Sealers
Penetrating sealers penetrate into the concrete, forming a chemical barrier that protects against moisture and stains. They do not alter the appearance of the concrete, making them suitable for surfaces where maintaining the natural look is essential. Penetrating sealers offer long-lasting protection and are generally easier to maintain.
When choosing a sealant, consider factors such as the concrete’s location, exposure to sunlight, desired appearance, and the level of protection required. Read the manufacturer’s instructions and product labels carefully to ensure you’re selecting the right sealant for your specific needs.
4. Tools and Materials You’ll Need
Before you start sealing your concrete, gather the following tools and materials:
- Protective gear: Safety goggles, gloves, and a mask to protect yourself from chemicals and dust.
- Cleaning supplies: Broom, pressure washer or hose, mild detergent or concrete cleaner.
- Repair materials: Concrete patching compound, trowel, putty knife.
- Application tools: Roller, brush, or sprayer, depending on the type of sealant.
- Mixing containers and stirring sticks (if required by the sealant).
- Drop cloths or plastic sheeting to protect surrounding areas.
- Appropriate sealant as per your chosen type (topical or penetrating).
- Any additional tools or materials specified by the sealant manufacturer.
Ensure that you have everything on hand to streamline the sealing process and avoid interruptions.


5. Step-by-Step Guide to Sealing Concrete
Now that you have prepared your concrete surface and gathered the necessary tools, let’s walk through the step-by-step process of sealing concrete:
Step 1: Read and Follow the Manufacturer’s Instructions
Each sealant product may have specific instructions for application, drying time, and reapplication. Read the manufacturer’s guidelines carefully before proceeding to ensure the best results.
Step 2: Test the Sealant
Before applying the sealant to the entire surface, it’s essential to conduct a small test in an inconspicuous area. This allows you to assess the appearance and compatibility of the sealant with your concrete. Follow the instructions and wait for the test area to dry before evaluating the results.
Step 3: Apply the Sealant
Begin by pouring the sealant into a paint tray or other suitable container for easy access. If using a roller or brush, dip it into the sealant and apply a thin, even coat to the concrete surface. Work in small sections, ensuring complete coverage without leaving any puddles or streaks.
If you prefer using a sprayer, follow the manufacturer’s instructions for the specific sprayer type. Keep a consistent distance from the surface and maintain an even application.
Step 4: Allow Drying and Cure Time
Once you’ve applied the sealant, allow it to dry and cure according to the manufacturer’s instructions. This typically ranges from a few hours to several days. Avoid foot traffic or placing any objects on the sealed surface during this time to ensure proper adhesion and effectiveness.
Step 5: Apply Additional Coats (If Required)
Some sealants may require multiple coats for optimal protection. If specified by the manufacturer, apply additional coats following the recommended waiting time between each application. Ensure each coat is applied uniformly and allowed to dry before proceeding.
Step 6: Clean Up and Dispose of Materials Properly
After completing the sealing process, clean your tools and equipment immediately. Dispose of any excess sealant or empty containers according to local regulations. Proper disposal is essential to protect the environment and prevent contamination.
6. Maintaining and Re-Sealing Concrete
Regular maintenance is key to preserving the effectiveness of your sealed concrete. Here are some tips to help you maintain and re-seal your concrete surface:
Cleaning
Regularly sweep or use a leaf blower to remove dirt, debris, and leaves from the sealed concrete surface. Promptly clean any spills to prevent stains.
Avoid Harsh Chemicals
Use mild, pH-neutral cleaners when washing your sealed concrete. Harsh chemicals can deteriorate the sealant and compromise its protective properties.
Periodic Inspections
Regularly inspect your sealed concrete for signs of wear, damage, or loss of effectiveness. Look for any areas where water no longer beads on the surface. If necessary, reapply sealant to these areas or consider resealing the entire surface if it has reached its recommended lifespan.
Timing for Re-Sealing
The timing for re-sealing concrete depends on various factors such as the type of sealant used, level of wear and tear, exposure to weather conditions, and frequency of foot or vehicle traffic. As a general guideline, consider re-sealing every 3-5 years for topical sealers and 5-10 years for penetrating sealers. However, always refer to the manufacturer’s recommendations for the specific product you used.


7. Frequently Asked Questions (FAQs)
Q1: Can I seal newly poured concrete?
Yes, you can seal newly poured concrete, but it’s essential to allow it to cure fully first. Follow the curing time recommended by the concrete manufacturer or consult a professional before applying any sealant.
Q2: Can I apply a sealant over an existing sealer?
In some cases, you can apply a new sealant over an existing sealer if the previous sealant is in good condition. However, it’s crucial to ensure proper adhesion and compatibility between the old and new sealers. Conduct a small test or consult a professional to determine if re-sealing over an existing sealer is suitable.
Q3: Can I seal colored or stained concrete?
Yes, you can seal colored or stained concrete. However, it’s essential to choose a sealant specifically designed for use on colored or stained concrete. Test the sealant on a small area first to ensure it doesn’t alter the color or appearance of the concrete.
Sealing concrete is a crucial step in protecting and prolonging the lifespan of your concrete surfaces. By following the steps outlined in this guide, you can ensure a successful sealing process and enjoy the benefits of a durable, stain-resistant, and visually appealing concrete surface.
Remember to choose the appropriate sealant, prepare the surface correctly, and apply the sealant with care. Regular maintenance and periodic re-sealing will help maintain the integrity of your sealed concrete over time.
Now that you have a comprehensive understanding of how to seal concrete, it’s time to put your knowledge into action. Enjoy the long-lasting protection and enhanced appearance of your sealed concrete surfaces! Call Allstar Concrete Coatings for your next sealed concrete project.
Free Consultation
Ready to learn more about how AllStar can help you? Take advantage of our free consultation to get the ball rolling.
Get Started
